Showing posts with label Christmas. Show all posts

Wednesday, December 21, 2016

The Tree Is Up


The temperatures finally warmed up enough 
for us to get out and cut down a Christmas tree.  

And now the tree is up and the decorating is done.


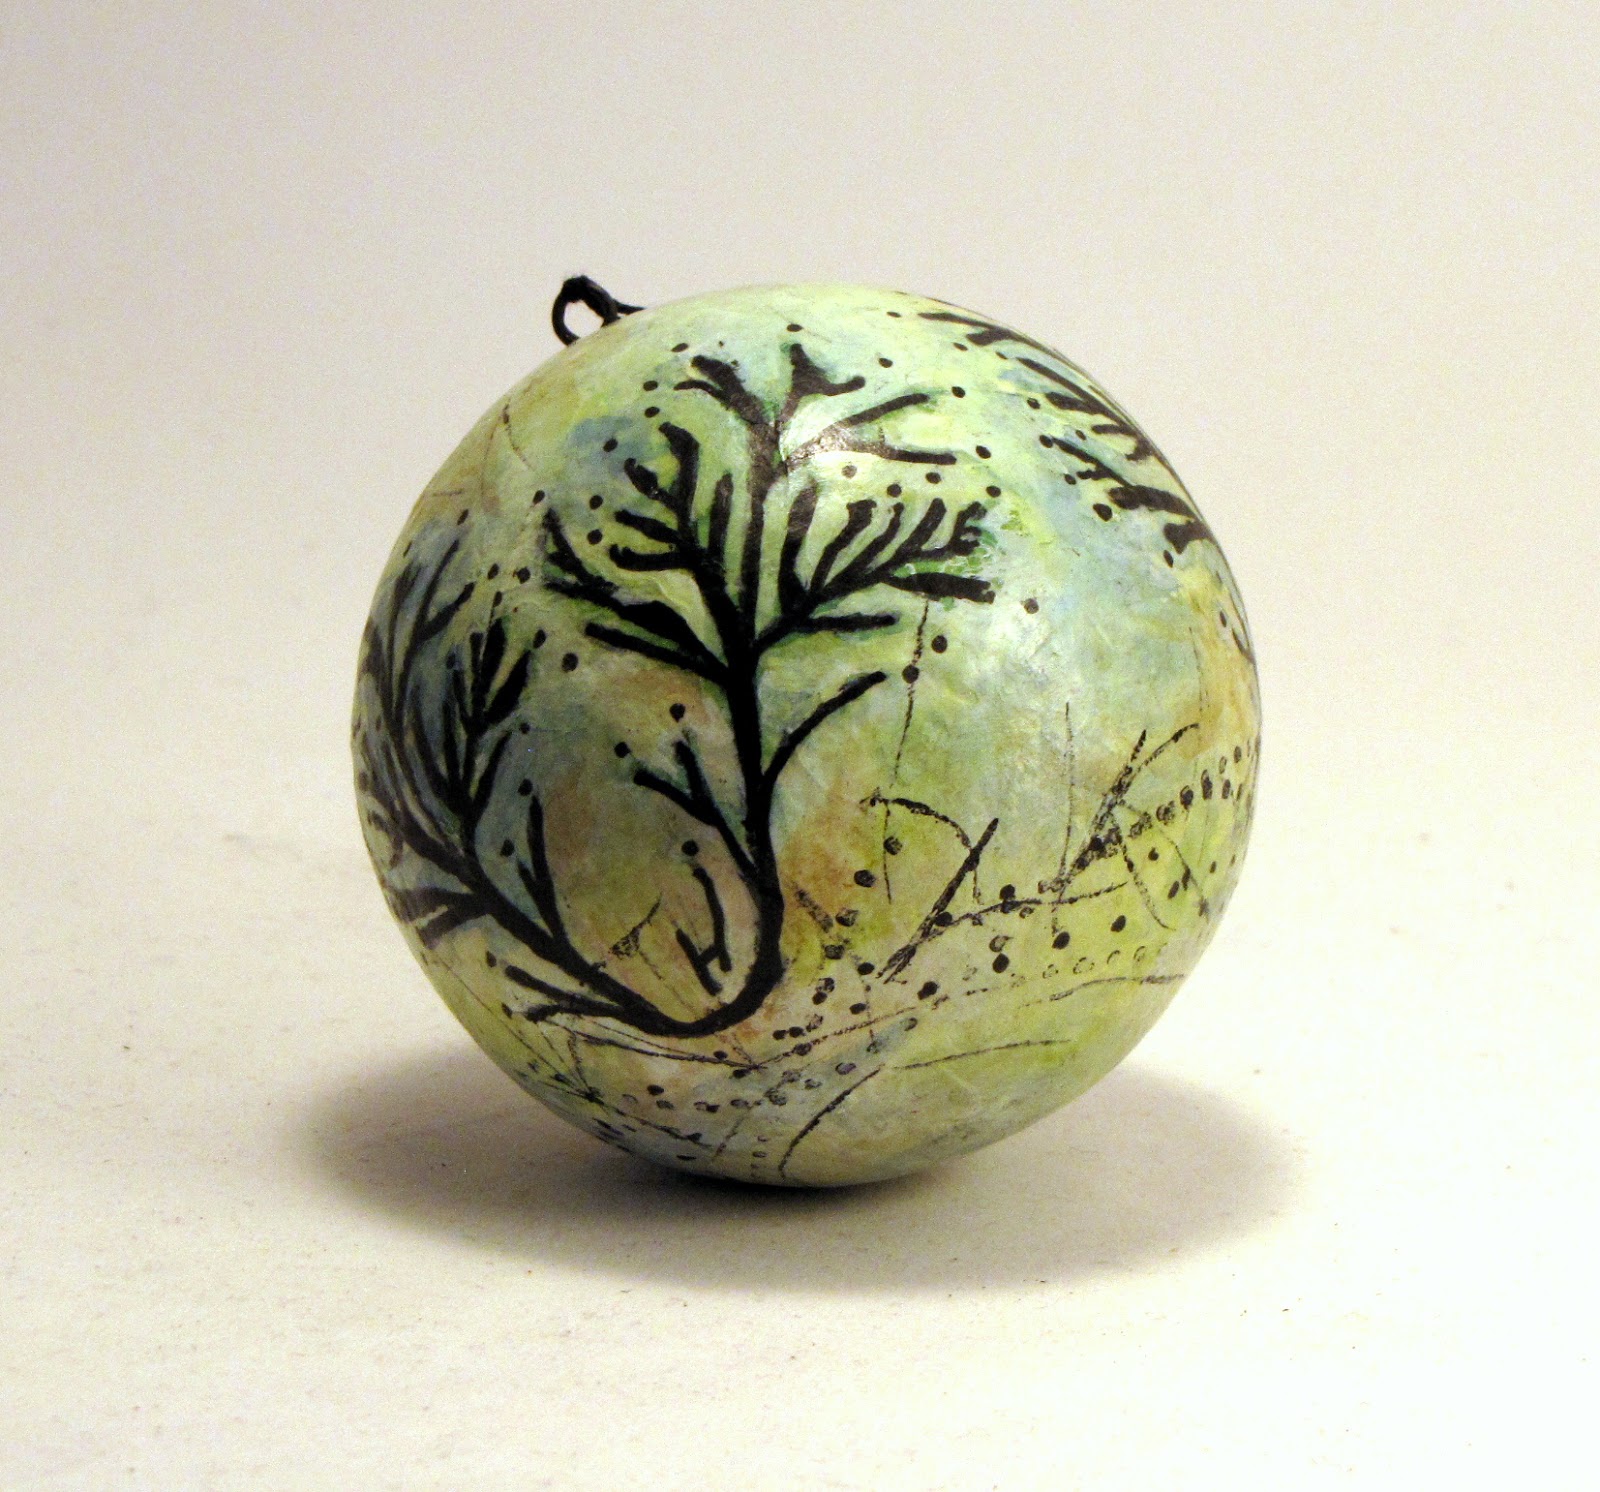
Including a couple of the decorations I made this year. 


I wish you all a very Merry Christmas!

Sunday, December 11, 2016

More Christmas Decorations


Making Christmas decorations has taken up lots of my time lately. 


There are some with trees....


and some with bicycles...


and some with branches.


And now I better get busy with getting a tree to hang these on...
and finish the shopping...
and wrap some presents .....
and do some baking ....
and clean the house.......

Friday, December 2, 2016

Christmas Decorations


I made these Christmas decorations just in time for 
the local Christmas sale a couple of weeks ago. 


They sold out very quickly, 
and I have been trying to find some time to make some more.


They have many layers, including paper pulp, tea bags, gesso and paint, 
and then images or stamps, some ink and collage bits 
before adding a final layer of paste wax. 


Maybe tomorrow I will have some time to play with some more of these
..... although I do have some snow shoveling to do!


Tuesday, December 23, 2014

Winter World


My winter world has been beautiful lately.

Today my daughter and I headed out for our walk at the brightest part of the day, 
so that we could take some pictures along the way.

Although there is some direct light on the mountain at this time of the year, 
we never see the sun, as it doesn't come above our mountain filled horizon.


I am not complaining, as I love winter,
but it does make picture taking somewhat difficult. 

Our walk took us over this little bridge and through the woods,
among the trees covered in snow. 


And my daughter could not resist
standing under the tree


and giving it a shake.


We had a beautiful walk,
and now I share with you some images
of my Winter World.....


And wish you all 
A Joy Filled Christmas Season


Monday, December 23, 2013


Season's Greetings


and Best Wishes
 
 
for the New Year
 

Monday, December 26, 2011

Handmade Gifts

Now that gifts have been unwrapped, I can share some of the necklaces that I gave away.


As I was finishing these up on Christmas eve, I decided I should gift myself one, as I haven't made something for myself for a long time. And so I chose this one to give myself.


I made this one with a tree in it


It is much smaller around but deeper than the usual ones I made. I like how it turned out, but it is hard to see in the pictures.


This is also a small bezel, for my bunny loving neice.


This is the first of a new style, that I hope to try to make again. I flooded a ring with solder, attached a small ring, and added seeds, rocks and a little shell, before encasing them in resin. It was trickier then it sounds, but I have some ideas how to make it work a bit better if I try it again.

Friday, December 23, 2011

Merry Christmas

A couple of weeks ago, I took some pictures of some birds, and altered the images a bit on my computer. Recently, I added some words to the image.....


and made it into Christmas cards.
I would have liked to send each of you a card in the mail, but instead send this card to each one of you electronically. I wish you all a very Merry Christmas, and I thank you for all the wonderful comments and support you continually give to me. I also love my time visiting so many of your blogs.

M E R R Y C H R I S T M A S

X O X O X O
Kim

Sunday, December 18, 2011

Christmas Busyness


Just like just about everyone, I have been very busy with the busyness of Christmas. I have been gentle with myself, and have mostly enjoyed the busyness. I will get gifts bought and wrapped, the house cleaned and decorated (with the help of the hubby), and I have promised myself I will enjoy the season, and get done what I can. Today I managed to finish up the Apple Mincemeat Tarts. ... I tested them too, and they are delicious!


I started them over a week ago, when I made the mincemeat. It is best if it can sit for a few days for the flavours to blend before it is made into tarts. The recipe is below if anyone feels like making some.


Apple Mincemeat

Grate peel from 2 lemons; squeeze juice into mixing bowl. Add peel. Peel and chop (or shred with food processor) 8 apples and toss in lemon mixture. Add 2&1/2 cups brown sugar, 2 cups currants, 2&1/2 cup sliced almonds (the really finely sliced ones), 2 tsp. nutmeg, 2 tsp cinnamon, 1/2 tsp salt, 1 tsp ground cloves, 1/4 cup melted butter.

Store in refrigerator, stirring daily. Let flavours blend for at least 3 days.

(This recipe makes a lot of mincemeat, I either make half, or will can or freeze it for future use)


Another thing that has been keeping me busy, but in the most enjoyable way, is taking care of a friends dog.


Unfortunately for us she is going home tonight, but we have had a wonderful time with her for the past 10 days or so.


Tuesday, December 13, 2011

JOY!

A few days ago I decided to make a few Christmas decorations to give to friends.


The base was made out of an old piece of book board that I covered in paper. I then took a piece of handmade paper that I had added texture to (when it was wet I stamped and made marks into it to and added bits of fiber, and when dry I added colour to the high points), and glued it to the front. I added the word joy, and a hanger to the top and a tassle to the bottom....


and it was ready for the tree.


This is one I made a couple of years ago - same process, but decorated with a copy of a painting and some buttons and lace.


That one actually ended up as a swap, and in Cloth Paper Scissors magazine.


Saturday, December 10, 2011

Handmade Packaging


I had made these little packages to use for packaging up necklaces and earrings that I sold at the art sales I attended. They are easy to make, and yet I really like how they look, and they use paper out of an old cookbook.


I really dislike buying paper to wrap gifts in, as I find there is spare paper all around us, that usually gets thrown away. So I decided to make some in the same style for Christmas gifts.


I started by cutting a piece of paper twice the size that I wanted the package to be.


I sewed straight across the top for decoration (not joining anything together) and then put the two edges together (without creasing the paper) and sewed them.


I then put the sewn edge in the middle front of the package and creased the edges, and sewed across the bottom of the package.


I finished it off by decorating it with stamps, folding the top edge over, and putting a torn strip of fabric on it that will be used to tie the package closed and to decorate it.